Thursday, April 28, 2011

McMahon Five - Hilda

  McMahon Five Designs new digital release for today includes "Hilda"- I love history and Victorian...so this image called my name...LOL.   I made a Pocket card for the Technique Junkies Technique of the week challenge.
**********************************Front***************************************

This is the pocket card with tag enclosed.  I love the Prima Patterned paper, and I used one 6x6 sheet of the green diamonds, and one of a multi design that I trimmed down and used to embellish the green.  Even the sentiment is from the multi design page.
  I sewed the sides and around the very top with a Zig-Zag stitch, and I sewed on the lace with a tiny straight stitch.
  The flowers are Kaiser Kraft plain and I stamped words with Stazon black then painted with Creative Inspirations Paint.  I added a half pearl to finish off the flower.


**************************************Back*********************************


This is the back of the pocket tag holder.  I did sew the front and back together- you can see the zig-zag around the edges.


**************************The Tag inside**********************************


The tag was cut out with the Nestability four just on the top., and I trimmed the paper behind it by hand. I sponged on Regal Rose ink through Mesh around the image. The Prima Patterned paper was added to the bottom of the tag and used a  Zig-Zag stitch to add lace to the bottom of the tag.

I added some silk ribbon through the top of the tag in pink, ivory and I ran Ivory through Shabby Shutters Ranger Distress Ink for the green
 ribbon.


This is the a picture of cutting out the top of the tag:


****************************************************************************
Challenges:
Amber's Craft-Use a digi
Crazy Challenge- Use three different designer papers
Lexi's Creations- Anything but a card
Paper Playtime-Friends
Stamp, Scrap and Doodle-Tagalicious

Thanks for stopping by! Shelly

Wednesday, April 27, 2011

Creative Belli Challenge-"ROYAL"

 The Creative Belli Challenge  theme for the next two weeks is "ROYAL"
                                     I decided to go all out and celebrate the Royal Wedding.
   I colored the image in Copics and highlighted with Gold Spica and Starburst Jelly Pen. The sweet image is from Sliekje and is from last July. The carriage is from Birds blog and the banner is a digi from Tiddly Inks. The sentiment is from Create with TLC. I do not know where the crown is from..... The Patterned paper is from 2005 and the pearls are from Markie's Finest Papers.
  My SIL and her DIL are going to Oprah on Friday to celebrate the Royal Wedding (how cool is that!).  I am going to send this to them for their Memory Book. 

  The "Royal" theme can be interpreted in a number of ways....We would like to see fleur de lis, diamonds, princess, crowns, tiaras... the color purple, etc !
             You can create any project you like as long as it follows the theme. 

The Belli Challenge is about using your 'old and forgotten embellishments as well.

Everyone is welcome to play along! Challenge a stamping friend!! If you upload to a gallery use keyword CBC116
For ideas and inspiration, check out the DT creations:

Ceal Pritchett

Anne Harmon
Robin Kirkpatrick
Jessica Stockmeyer
Joan Ervin
Maria Matter
Darsie Bruno
Joy Hadden
Robin Parker
Mary Marsh
Karen Wallace

Also, if you upload a card to any galleries online  to Splitcoast , PCP, Stamp TV or another online gallery be sure to add CBC116 in the keywords section.

Challenges:
A Spoonful of Sugar- Royal Knees Up
Die Cut Dreams- Wedding
Kaboodle Doodles- Here Comes the Bride
Creative Inspirations- Use a Digi
Pink Gem Challenge-Pearls or Swirls
Stamping Vacation-Wedding
Totally Papercrafts-Wedding


Thanks for stopping by! Shelly

McMahon Five designs 4/28/11 New Releases

McMahon Five Designs releases for today:

We have a HUGE ANNOUNCEMENT this week!
I am so excited to share with you that we are releasing a new line of Digital Papers called
Fusion Flair.
We know how much you love Shawne's digital papers.
Well, we are mixing it up even more!
Shawne is taking one of the M5D digital images and creating
beautiful, stunning coordinating digital papers to go with it!


For Fusion Flair's Debut,


Shawne used Peony Digital Stamp


and made these amazing, gorgeous coordinating papers!


Peony Passion - The Pink Collection


Card by: Amy


Peony digital Stamp, Peony Passion - Pink digital papers


Card by: Amy


Peony Passion - The Coral Collection


Card by: Sue

Peony Passion - The Coral Collection, Wonderful Mother digital stamp, Prima Fairytale White Roses, Prima Teal Mini Roses


Card by: Sue

Peony Passion - The White Chocolate Collection


Card by: Card by: Sue


Peony Passion- The White Chocolate Collection, If You Truly...digital stamp, Spellbinders Labels 20


Card by: Card by: Sue


Hilda


Pocket Tag by: Shelly


Hilda digital stamp, Prima Annalee Paper Pad, Self Adhesive Pearl, Kaisercraft Pink Flower, Spellbinders Labels 4


Pocket Tag by: Shelly


Pocket Tag by: Shelly


Out To Dry


Card by: Sue


Card by: Sue


A Kitties Love


Card by: Sue


Card by: Sue


Card by: Michelle


The Kitten Basket digital stamp, Spellbinders Parisian Motif, Spellbinders Parisian Accents, Prima Flower

Sweet Love 


Card by: Raven


Sweet Love digital stamp, Cherry Real Wood Paper, Prima Pink Lilies


Real Wood Paper


Card by: Sue
Spellbinders Cross Collection, Spellbinders Labels 4,  Walnut Real Wood Paper, Birch RWP


Card by: Sue
Bazzill Vintage Keys, Birds Eye Maple Real Wood Paper, Wenge RWP, Cork Suede RWP, Douglas Fir RWP, Aspen RWP, Walnut RWP, Hickory RWP


Card by: Sue

Spellbinders Lotus, Spellbinders Fancy Tags, Spellbinders Labels 10, Butternut RWP, Birch RWP, Koa RWP, Cherry RWP


For more details on the projects above, visit the Design Team blogs!


Thanks for stopping by! Shelly

Tuesday, April 26, 2011

CAS card for Brian and a Hoppy Frog for Rachel

Guylou's Inimitability Color Challenge


 My 4 yr old nephew Brian was recently diagnosed with Wilm's tumor of the kidney. He had his kidney removed, had a round of radiation and is now on weekly Chemo. I received this image from Guylou's Inimitability for the Spot and Dots challenge and it is perfect for a card for a little guy.....Brian is doing OK with the Chemo- he only likes nurses in Pink shirts though.......I hope he likes this doctor with the Teddy Bear!  The image was colored with Copic markers and I used a Technique Junkies tutorial called Copic Texturizing on the bear. 
  I made a second card to donate to a Chemo center- for patients to use for Project Give Thanks. (Michelle Zindorf's sister has info on her blog HERE).
 Two CAS cards for me- WOW!

Challenges:
Claudia and Company- CAS cards
Bunny Zoe's Crafts- One for the Boys
Incy Wincy-Buttons and Bows
Stamp-N-Doodle-Masculine
Aly's Sunday Challenge-Baker's Twine
Cheerful Stamp Pad-There is a Man in my Life

Well, I decided I could not send a card to Brian and not send one to his sister Rachel- so I used the progressive freebie from Designed2Delight.

I tried the Copic Texturizing again and ended up coming up with the pop up Frog due to a little mishap.....
 And, of course, I had spent all of this time coloring, cutting and layering....so decided I was not going to throw this card away.........so, I cut a little piece of cardstock and fan folded it and attached it to the back of another colored frog......
Sorry that turned out a touch blurry- but you can see what I mean......
  I think I can live with it and Rachel will be delighted!  The card was colored with Copics and the Sky was sponged with Blue Bliss and a template using the scallop oval punch from SU. I added Starburst Jelly Pen to add glitz on the butterflies and the centers of the flowers.

Challenges:
Party Time Tuesday-Anything Goes
Stamping Boutique-winged things- butterflies
Make it Monday-Anything goes
NettieG's Digital Gems-Bugs and Plants
Stamps R Us-Bugs and embossing

Thanks for stopping by! Shelly

Friday, April 22, 2011

Bloggers Challenge- Lace or Ribbon

 I had fun stamping with my friend Kim- who has recently signed up to be a SU demo.  She made her version of a 'Shellie card' and I got to make one too:

  We stamped the sprig of flowers and then embossed the background. We punched the ivory and sponged it and added the DSP.  We punched out the notch with the photo corner punch. We gathered the seam binding and punched out the leaves from the bird punch- then added the rose finding.  Oh I love this card!
  Here is a close-up of the ribbon:

  I hope you have a Blessed Easter for those that celebrate! 

If you would like to join in the Bloggers challenge- HERE is the link to Lisa's blog.
 

Thanks for stopping by! Shelly

Faux Flower Soft Tutorial

 I love the look of Flower Soft, but I do not always have the right color(s) on hand. Here is how you can make your custom colors of "Faux" Flower Soft with Supplies you have on hand.

Take a piece of styrofoam and break it in half  (if you have a circle or an egg shaped piece of styrofoam, cut it in half with a knife).

  All you have to do is rub the pieces together and it will break off in little pieces.  You can see I do this right into a gallon sized baggie and then I do not have a mess.......
  This is a good sized baggie of styrofoam that has been "broken up":

  Now, get out anything liquid that you can mix with the flower soft to add color.  Here are some ideas:
Reinker
Copic Reinker
Distress ink applied on a craft sheet or your baggie then spritzed with water
Glimmer Mist
Creative Inspirations Paint

  Mix the styrofoam and the color of your choice- you can add color right into the baggie OR you can mix the two on a Craft Mat or on a baggie.  I use ~ 6- 8 drops of reinker to start off with-start conservatively and add more ink if needed especially if you want  to make a lighter color- it is easier to add more reinker to darken it than to add more styrofoam to lighten it up..
  Close the top of the baggie (this is a jewelry sized bag from a crafting store like Hobby Lobby). Rub the baggie together to mix in the color.  I used about 2 tbsp of styrofoam ( I did not measure it- just giving an approximate to give you an idea of how much to use).  Keep rubbing the bag- moving the styrofoam around- get it out of the corners and keep mixing until you can no longer see the white. Mixing in the bag avoids ink on your fingers......    I wanted some variety in my colors, so made darker and lighter shades.... You will find a few flecks of larger pieces-just toss them out....or keep them for character on your project.
 Top Row Lt to Rt samples:
-Frayed Burlap Distress Ink- swiped on the top of a baggie and misted with water- I used the end of a paintbrush to mix in the styrofoam.
- Rose Red SU reinker
- G24 Copic reinker
-Sky Blue Glimmer Mist sprayed directly into the baggie with the styrofoam
-Creative Inspirations paint (Antique Silver)- I used the end of the paintbrush and applied the CI paint to the side of the baggie- mix with the styrofoam- add more paint if necessary.
 The sample on the far left below was made with Brilliance Galaxy Gold reinker.
***Allow the media to dry completely prior to adding to your project, so it does not stain your work.
 
  I now have a rainbow of Faux Flower Soft colors to use on my projects. How fun to have 'Custom' colors to match your cardstock or Designer Patterned Paper.
  Adding your Faux Flower Soft to your project is as easy as adding a dab of glue where you want the Faux Flower Soft to be, pour some of the (dry) product right on the area- tap lightly with your fingers and then tap off the excess.  if you have an area of poor coverage, apply a second time to fill in the desired area.
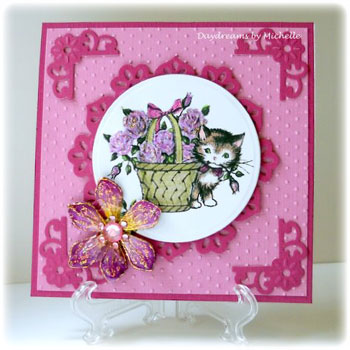
  Here is my card using the Faux Flower Soft with the close-up first:

and the card:


The image shown is Wheelbarrow Blossoms (McMahon Five Vintage Digital Image)
Other product shown available at McMahon Five: Copics, Prima Madeline paper pad, Spellbinders Parisian Mofits and Accents, Prima Madeline Roses, Prima Pink Mini Roses, Prima Warm Beige Lace, Kaisercraft Self Adhesive Pearls

Here is a link to 'Inspire Me Fridays" with Maria Matter

                                                      This is Fun- Inspirational Blog


Shelly Schmidt